The most powerful form plugin for WordPress is Gravity Forms, hands down. Along with Advanced Custom Fields and my Core Functionality Plugin, it is one of the three plugins I include in every WordPress website I build. The options of what can be done with Gravity Forms are endless. This tutorial will go over how you can send conditional notifications with Gravity Forms based on the page your form is submitted from.
Why would you need to send conditional notifications with Gravity Forms?
In a recent project I was tasked with creating a lightbox that was triggered when a user clicked a specific call to action button. The lightbox included a form to sign-up for an email list to receive a free eBook. The client offered six different eBooks that will automatically email to the user after the sign up. One approach would be to create a different form for each page. That approach would be tedious and create more work over time if more eBooks are offered.
The solution was to create a single form to handle this automatically. We simply need to create a conditional notification based on the page the user submits the form from. If and when more eBooks are added we simply need to add a new conditional notification. This is a perfect case to use conditional notifications with Gravity Forms.
Setting up the form
The first thing to do is create the form. In this case it is very simple form with a first name, last name, email and phone number. The other field required to make this work is a hidden field where we’ll embed the post ID.
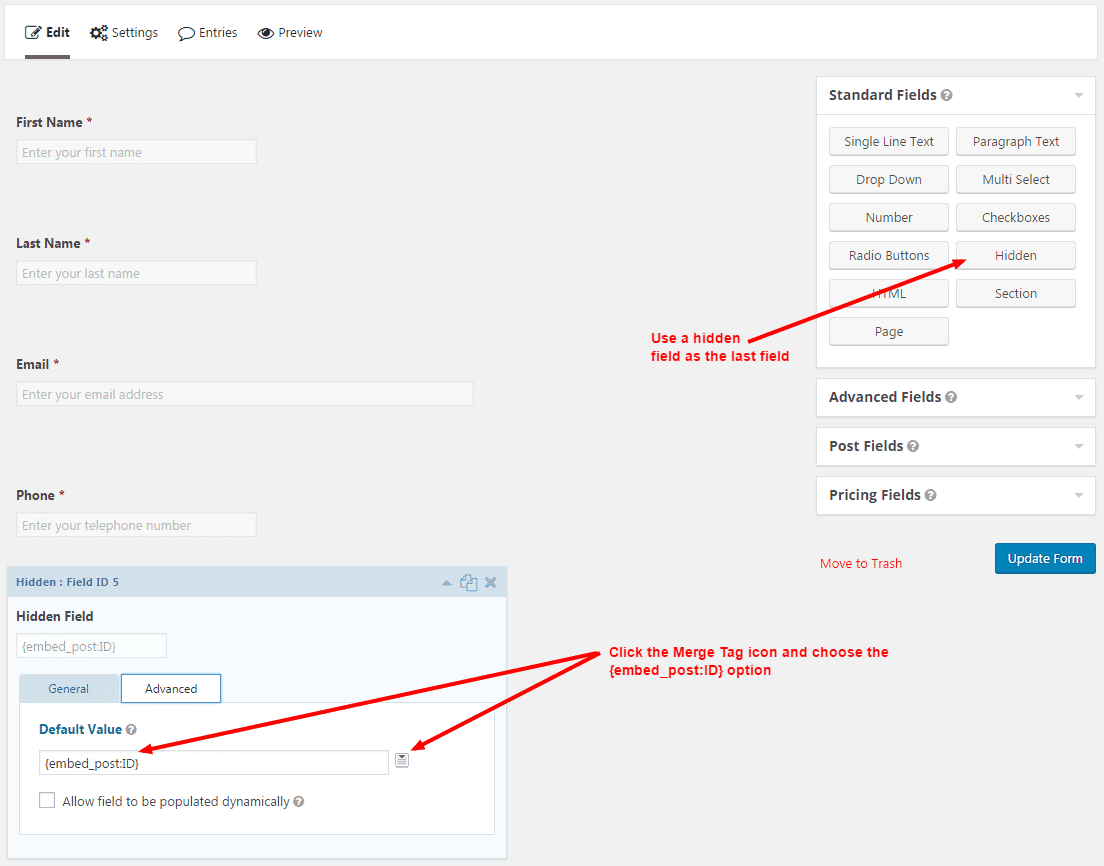
As you can see in the image above, the final field in the form is a hidden field. On the ‘Advanced’ tab of this field click the merge tag icon and choose {embed_post:ID}. This will automatically create a hidden field that will store the page ID when the form is submitted. This value will be used when creating our conditional notification to in-turn send the proper notification.
Setting up the Conditional Notifications
Now we will set up the notifications. First gather the page ID for each page that needs to have a notification setup. There are a few places to find the page ID. The quickest way is to simply go to the page on the WordPress dashboard and look for the ID in the URL like this:

The page ID is shown directly in the URL of the page edit screen.
With the list of page IDs ready click on the notifications section of the form.

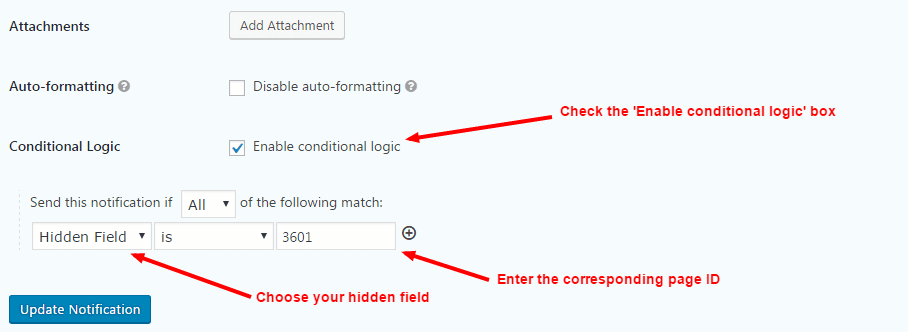
Create a notification for each page ID in the list. At the bottom of the notification page check the ‘Enable conditional logic’ button, choose the hidden field, and enter the corresponding page ID. This will tell the notification to only send if the form was submitted from that specific page.
Summary
This simple setup will allow you to use one form to accomplish auto-responses across your entire website. As a quick summary, here are the steps to accomplish this:
- Create your form with a hidden field to capture the page ID
- Gather the page ID for each page you need a notification for
- Create a notification for each page you’d like to have a custom auto-response from
- Set-up conditional logic on each notification based on your hidden field value equaling the page ID of the corresponding page
That’s all there is to it! If you have any questions feel free to comment below.
Note: You’ll see an ‘attachment’ link above the conditional logic area in my notification image. I use the following plugin to allow for attachments to notifications (https://wordpress.org/plugins/gravity-forms-notification-attachments/). This is how I attach the eBook to the email. It hasn’t been updated in a long time, but still works like a charm!